

Pretty Pinwheel Baby Blanket
- Rebeca Grieco
- Aug 14, 2025
- 4 min read

Pretty Pinwheels Blanket – Endless Designs with Two-Colored Granny Squares
There’s something truly magical about granny squares. Simple on their own, they become incredibly versatile when worked in two colors—and the design options are almost limitless. My Pretty Pinwheels Blanket is a perfect example of how just a few color choices and clever arrangements can create a variety of eye-catching patterns.
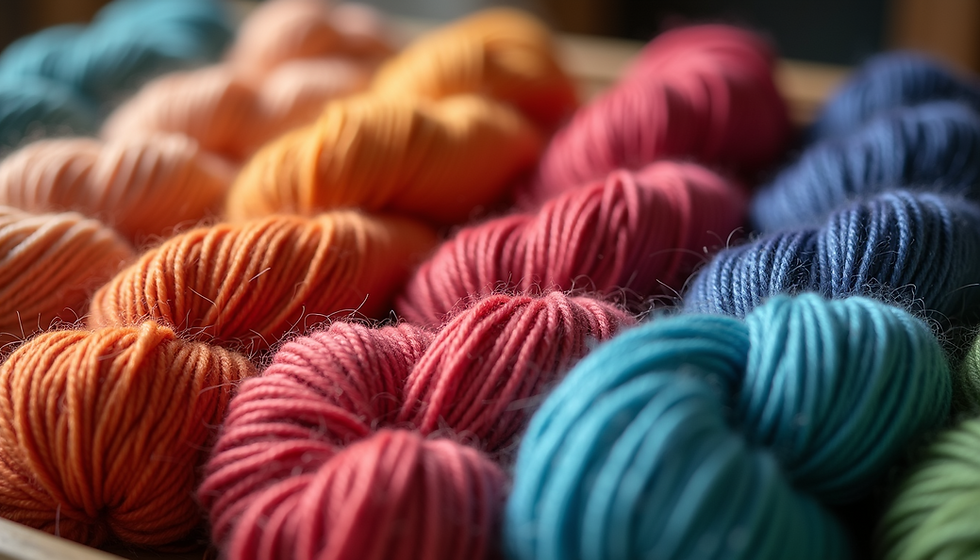
For this blanket, I used pink, rose, and cream yarns, working each square diagonally with two colors. By rotating and rearranging the squares, I was able to experiment with multiple layouts before deciding on the final pinwheel design. It was so fun to see how each layout completely transformed the look of the blanket—each arrangement told its own story!
Why I Love Two-Colored Granny Squares
Two-colored granny squares offer a world of creativity without overwhelming you with too many color changes. A simple rotation of a square can shift the entire pattern—creating pinwheel bursts, chevrons, diagonals, or even diamond shapes. Best of all, you can lay out your squares on a table or floor, like I did, and play around with the placement until you find the design you love.
Layout Inspiration
Here are a few layouts I tried with the Pretty Pinwheels Blanket squares:
Classic Pinwheel Blocks- Four squares form a single pinwheel block, creating a quilt-like effect.

Diagonal Stripes -A simple rotation of the squares creates clean, modern diagonal lines.

Flying Geese- This is a striking arrangement where triangles are pointed in one direction.

Chevron Waves- By alternating color placement, the squares form zigzag waves.

Diamond Centerpiece A bold, central diamond shape framed by rows of color.


The Finished Blanket
For my final version, I chose the pinwheel layout and framed it with a scalloped border based on a crochet design from the 1890s. This vintage detail adds a touch of old-world charm, beautifully blending tradition with the modern movement of the pinwheel design. The result is a blanket that feels both fresh and timeless—perfect for gifting or displaying.

Skill Level
Intermediate
Materials
I Love This Yarn Sport (2.5 oz, 71g, 230 yds, 210 meter) 100% Acrylic
Ivory – 4 skeins
Hot Rose – 2 skeins
Pink – 2 skeins
Or any light / #3 weight yarn
Size 7/4.5mm crochet hook
Stitch marker
Tapestry needle
Finished Size
35” x 45”
Abbreviations
Ch/Chs = Chain (s)
Dc = Double crochet
MR= Magic Ring
Rnd = Round
Sc = Single crochet
Sl st = Slip Stitch
St = Stitch
Tr = Treble
Special Stitch
Picot = ch 4, insert hook into the 1st ch made, make a sl st.
Pattern Instructions
2 Colored Granny Square
With Ivory
Rnd 1: MR, ch 3 (counts as 1st dc), 2 dc, 3 dc, ch 1, Drop the Ivory and YO with Pink to complete the 2nd ch, 3 dc, ch 2, 3 dc, ch 2, sl st to top of ch 3.


Rnd 2: Turn. Sl st in 1st ch, ch 3, 2 dc in same ch-2 sp, ch 1, (3dc, ch 2, 3 dc in next ch 2 sp), ch 1, 3 dc in next ch 2 sp, ch 1, drop the Pink and YO with Ivory to complete the 2nd ch, 3 dc in same ch 2 sp, ch 1, (3dc, ch 2, 3 dc in next ch 2 sp), ch 1, 3 dc in final corner, ch 2, sl st to top of ch 3.


Rnd 3: Turn. Sl st in 1st ch, ch 3, 2 dc in same ch-2 sp, ch 1,3 dc in next ch-1 sp, ch 1, (3dc, ch 2, 3 dc in next ch 2 sp), ch 1, 3 dc in next ch-1 sp, ch 1, 3 dc in next ch 2 sp, ch 1, drop the Ivory and YO with Pink to complete the 2nd ch, 3 dc in same ch 2 sp, ch 1, 3 dc in next ch-1 sp, ch 1, (3dc, ch 2, 3 dc in next ch 2 sp), ch 1, 3 dc in next ch-1 sp, ch 1, 3 dc in final corner, ch 2, sl st to top of ch 3.

Rnd 4-5: Repeat rnd 3. Finish off.

Assembly:
Assemble your squares according to the chart below:

To join the squares, I used the Invisible Seam method. I first discovered this joining technique on YouTube, [Meema Makes]
https://youtu.be/tq5V4KXGgx0?si=51z_GF4Eo5o47752 and it’s perfect for projects where you want the focus to stay on the design rather than the seams—it blends the squares together beautifully.
Border:
I first came across this border on the Just Vintage Crochet YouTube channel, and it immediately caught my eye for its delicate, timeless style. You can find the video here: [Just Vintage Crochet – 1890s Border]
Rnd 1: Attach Ivory to any corner and sc. (Ch 3, sc in next ch-1 sp), repeat to next corner, (sc, ch 3, sc) in corner, repeat from to around.
Note: Use a sc2tog where 2 squares are joined.

Rnd 2: With Hot Rose, sl st to next ch-3 sp, (sc, hdc, dc, picot, dc, hdc, sc) in all ch-3 sps around. Sl st to the 1st sc. Finish off Hot Rose and pick up Ivory.

Rnd 3: ch 6 (counts as tr, ch 2), sc in top of picot, ch 2, tr in sc from rnd1, ch 2, repeat from to around. In corners, work (sc, ch 2, sc, ch2, sc). Sl st to the 4th ch of beg ch.

Rnd 4: Sl st to 1st ch-2 sp, (sc, 2 picot) in next ch-2 sp, sc in next ch-2 sp, rep from to * around.

Finish off.
Click here if you would like a printer friendly version


Comments